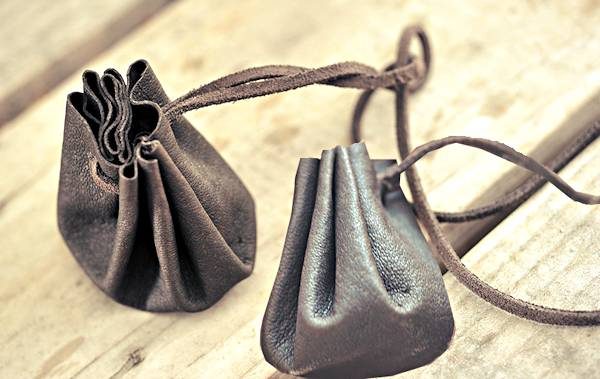
This simple DIY leather circle drawstring poke bag (also known as a money pouch or round coin purse) is as simple as they come. You can make it as large or small as you’d like, wear it as a necklace, on a belt, or even tuck it into a larger pouch to hold your coins or smaller knickknacks.
It uses very little material, can be made in less than 5 minutes, and is extremely durable! Easy enough even for a kid’s art project.
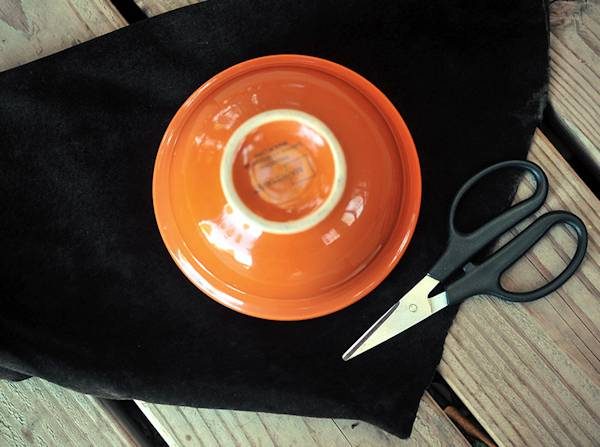
Cut out a circle of leather.
This can be as large or as small as you’d like. We wanted this pouch to be small enough to just fit into your palm, so we used a cereal bowl as a template for our circle (just under 6 inches across).
You can usually find old leather jackets and skirts at yard sales or thrift stores to cut up. They are one of the easiest and most inexpensive sources of leather scraps for small leather projects! We sometimes have small bags of leather scraps in our store.
Poke holes in the leather.
Once you’ve cut out your circle of leather, you can use a leather punch to make the holes for the lace, or an awl or similar pokey tool, and poke holes at even intervals around the outer rim of the leather just big enough to run your lace through roughly half an inch to 3/4 inch apart, depending on the size of your circle.
You want your stitches close enough together so it gathers up evenly when you pull the lace strings. Put your lace holes in a little from the edge so they don’t rip out when you’ve opened and closed your poke bag a bunch of times.
If you have a surgical S needle, you can skip the poking holes part and just sew your lace directly through the leather. An S needle will push right through most deerskin or any garment weight leather with little effort, no pliers required.
If you have never used one, I’d highly suggest you try one. You will never use anything else again for working with leather! Forget clumsy needles like Glover’s needles that probably have to be pulled through leather with pliers.

Since leather does not have a tendency to unravel as fabric does, you can leave the edges completely raw. However, if you don’t like the raw edge look, and if your leather is thin enough, you can fold over the edge of the hem and poke a hole through both layers, effectively sewing the edge under when you run the drawstring through.
But for our pouch, I kept the edges raw. I personally prefer the rustic look of the unfinished edge, and it’s easier to sew through a single layer of leather than it is a double layer.

String up and gather the complete circle of leather.
You can cut a narrow strip of leather from your scraps or buy a precut leather lace if you prefer precise uniformity.
A lace about three to four times the length of the diameter of your leather circle is a good place to start for how much lace you’ll need, then adjust longer or shorter depending on how you want to use your finished poke bag.
Take the leather lace, and feed it through the holes you’ve created, making a loose running stitch until you’ve completed the circle.
Then, pull gently on the leather string so that the circle is gathered up into a loose pouch.

Tighten your pouch and finish!
Simply squeeze the gathered leather lace till its tight, and then cut off your leather lacing to the desired length.
You can add any embellishments you’d like, from a beadpatch to a crystal or fetish animal, claw or tooth or shell button on the bag and/or beads or feathers threaded on the ends of the drawstrings that cinch the pouch closed. The sky is the limit! Make it as elaborate as you wish, or just leave it plain, whatever suits you.
Once you’ve made your finishing touches, (or not) voila! You have a simple leather drawstring pouch that will last you for years!