
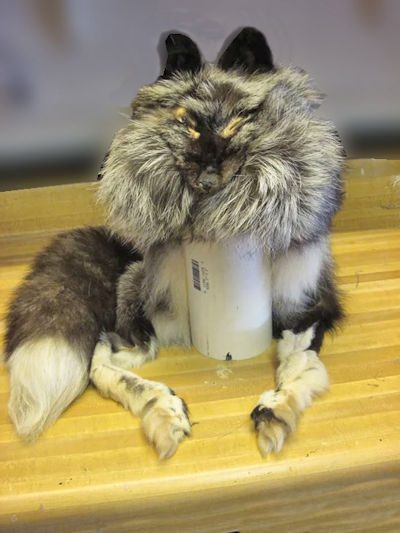
There are many traditional styles of fur hats that can be easily made by hand, one of the most unique being the “mountain man” style which includes the animal’s hindquarters and tail draping across the wearer’s shoulders.
The exact origin of this style is not well known, although some say that the long drape of fur helped protect the back of wearer’s neck and shoulders from the cold wind. It’s no doubt one of the warmest hats you will ever wear!
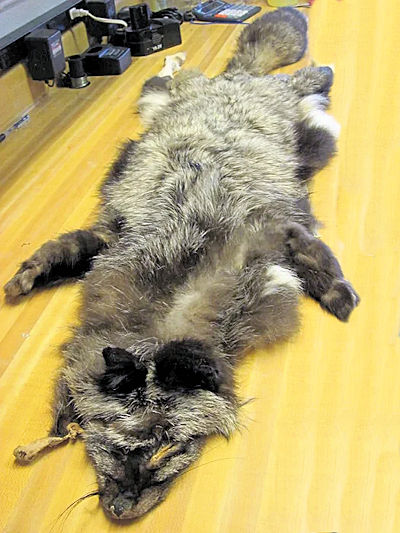
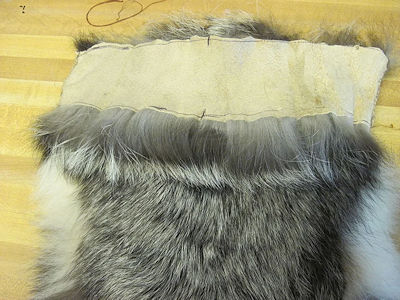
The photo on left shows the silver fox pelt that we will use for this demonstration.
Materials you will need for this project:
- Tanned animal pelt (Fox, coyote, beaver, lynx or raccoon are typical for this style)
- Artificial Sinew
- S Needle, or sewing machine suitable for stitching through leather.
- Felt tipped marker
- Tape measure
- Utility knife or razorblade for cutting out the pattern.
Preparing the Hide
Before starting your hat, sew up any holes or visible damage in your hide. When sewing by hand, I use a very tight whip-stitch, which is very strong and can’t be seen at all from the fur side.
 I use artificial sinew to keep it as authentic as possible, and it is very strong. I swear by S needles for sewing leather. You will, too, once you try one. They go through even thick leather with practically no effort and stay sharp for a year or more. No need to wear a thimble or fight with pliers to get your needle through tough leather like you have to do with a Glover’s Needle.
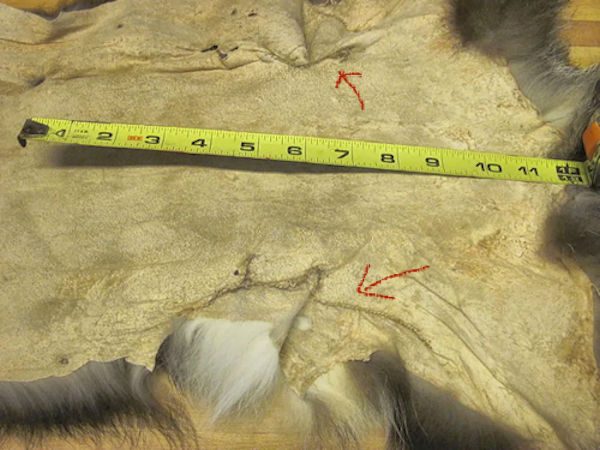
Take your measurements before cutting any parts of the hide. For the Mountain Man style using a fox pelt, I measure 12″ up from the base of the tail and mark the line with a felt tipped pen. (For larger skins like coyote, you may choose to make the drape even longer in back, or for smaller skins like beaver and raccoon, you may shorten, or even omit the drape). But be sure to leave enough room to mark the rest of your pattern, as you’ll see in the next step.
Mark your pattern
 If you are new to fur crafting, it is always a good idea to cut your initial pattern out of paper or cardboard, tape it together and try it on your head to make sure it fits. Adjust it accordingly and then trace out your paper pattern onto the leather with a felt tipped pen.
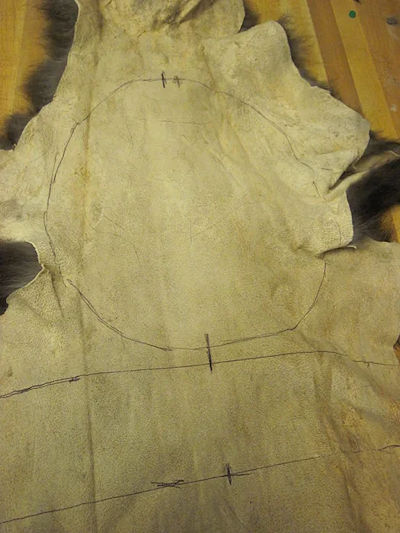
Draw out your pattern onto the top half of the leather, after measuring and marking your 12″ section at the rear of the hide.
Measure around your head, and allow a little extra for the width of the seam. The strip drawn in the center of the hide will be the band that goes across the front of your head. The circle will be the top of the hat. The short 1/2″ lines mark the very center of the pelt, to ensure everything matches up properly when sewn together. When you sew it together, make sure the fur is going the same direction on all of the pieces.
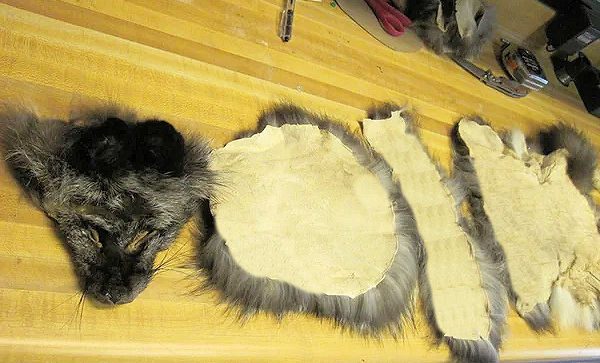
Cut out your mountain man hat pattern
 Be sure to cut all pelts with a utility knife or razor blade, rather than scissors, to avoid chopping the hairs. Scissors will make a real mess with the fur and leave a distinct line where it was cut. A utility knife will only cut the leather, without damaging the fur itself.
Cut out each of the pattern sections you have traced, cutting from the skin side of the pelt, and get ready to start sewing!
Sewing the Head Band
 Start by sewing the band that encircles your head to the drape that will go over your shoulders.
Work with the pattern inside-out, connecting the front strip of hide onto the back “drape” section, using close, tight stitches and matching up the marks for the centerline.
If you are including the animal’s face on the front of 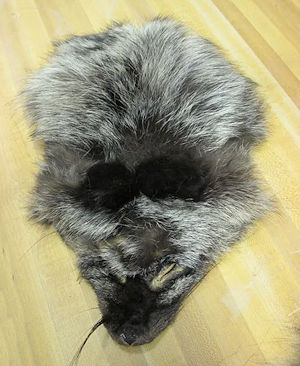 your hat, stitch the back edge of the face onto the top “circle” ahead of time to avoid the challenge of trying to sew it on after everything else is finished. But don’t sew down the nose of the face just yet.
After the face is sewn on, carefully align the top circle onto the band and begin stitching.
Again, keep your project inside-out during this part of the process and use tightly-wound, even stitches for the entire piece to hold the skin together securely.
You are almost finished!
Finish and Wear It!
 After you finish stitching, revert your hat so the fur side faces outwards again, and secure the front of the face to the band with a few stitches along both sides of the snout, and work the ears so they stand up straight.
With the same pattern, you can also make a lining for the inside of your hat, with felt, wool trade cloth, or other soft fabric for extra warmth and comfort.
And now you’re finished! Wear your new mountain man hat with pride!