
If you’ve ever tried beading with only a needle and thread, you’ll know it’s a pretty long process. Once you decide to introduce a pattern into the design, you have a complicated and time-consuming technique that is off-putting to most.
Bead looms have been used in both traditional and modern-day beading, and makes beading a lot faster and easier, with a much larger scope for creating a pattern. Even if you’re a beginner, you can make bigger and better designs much faster than hand weaving! Read on to find out how.

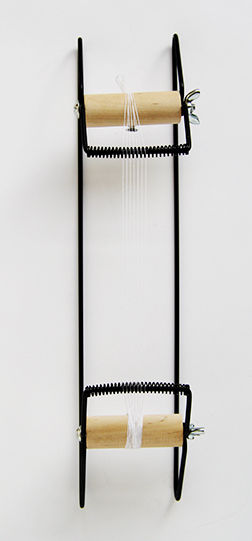
Weaving with beads is similar to weaving on a cloth loom and uses many of the same methods and materials. When threading or “warping” a bead loom, you are stringing the long vertical threads on the loom. These will eventually hold the design. The following are step by step instructions on how to string the loom for simple projects.
Supplies Needed:
- Bead Loom
- Seed Beads
- Beading Needle
- BeadingThread
- Bees Wax (Optional)
- Scissors
- Super Glue (Optional)
- Bead Patterns
Prepare the Loom
Step 1
First, we’ll need to set up the warp threads (the ones that are attached to the loom). Decide on the width of your design. I’ve chosen to create a strip seven beads wide (if you want to create triangular shapes, always go with an odd number so you get a ‘one bead’ point in the middle). Add one to the bead number, and that becomes the number of warp threads you’ll need.
Step 2
Decide how many beads wide and how long you wish your finished project to be. Measure out your beading thread, increasing the length an extra 12 inches and cut your strings.
You will need one more string than the number of beads wide your project is. For example, if you are going to make a bracelet that is 7 beads wide, than you will need 8 strings. Loosen the wing nuts on the ends of your bead loom.
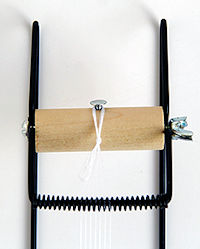
Line up your strings and knot them together at the ends into loops.
Step 3
 Hook the loops over the nail or screw in the wooden barrels on the loom, and roll to tighten the threads and create tension.
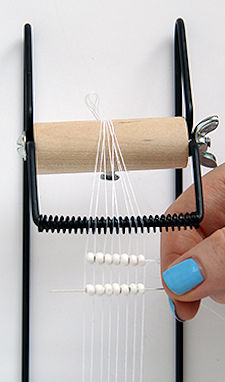
 Separate each of the threads into individual spaces on the wire coil in between the barrels.
You will want one thread in each space on the string, or one string in every other spring space, depending on the size of beads you are using. The important thing is to keep your threads spaced EVENLY APART.
A crochet hook is a very handy tool that can help to separate the threads.
Carefully turn the tension rod until you have rolled about 6 inches of thread around the rod, then tighten the wing nut.
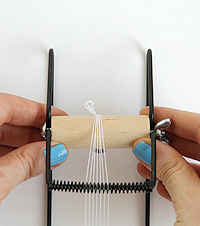
Step 4
Pull the threads straight so that they line up at the bottom with the same spring loops as on the top. You want the strands to be as straight as possible. Tie a knot in the ends of the strings and place behind the screw or hook on the bottom of the tension rod.
Turn the tension rod until about 6 inches of thread around the bottom tension rod. Tighten the wing nut.
Step 5
Return to the top and turn the tension rod until the strings are pulled taut on the loom. You are now ready to bead your project.
Start Weaving
Step 1
Thread your needle with a long piece of thread. Ideally you don’t want to have to change your weft thread (the weaving thread that is threaded onto the needle) too often, so cut a piece of thread that is long, but still manageable without getting it all tangled up.
Step 2
 Thread your first row of beads onto the needle. Do not move them down onto the thread. Just keep them on the needle for
 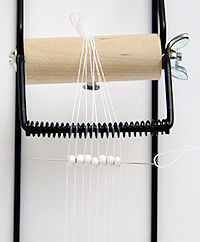 now.
now.
Step 3
Lay the needle on top of the warp threads, and arrange the beads so that they each sit between two warp threads.
Use your finger to hold the beads in place, and pull the needle through the beads. Leave a long tail of thread hanging from the front bead.

 Step 4
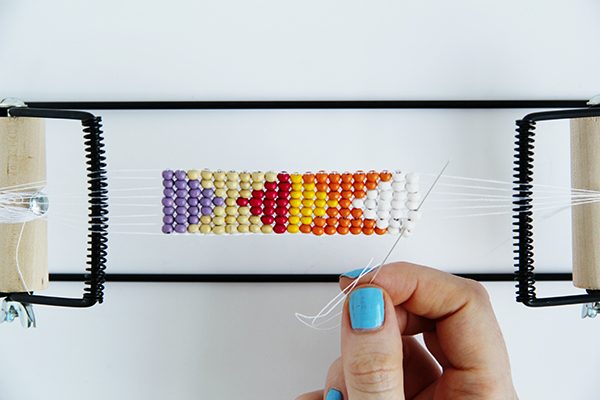
Turn your needle around, and thread back through the beads. This time, make sure the needle goes underneath each of the warp threads as you thread through the holes in the beads.
Holding the beads steady with your finger, pull the needle all the way through. This is the first row complete!
Now repeat steps three and four to create the second row.

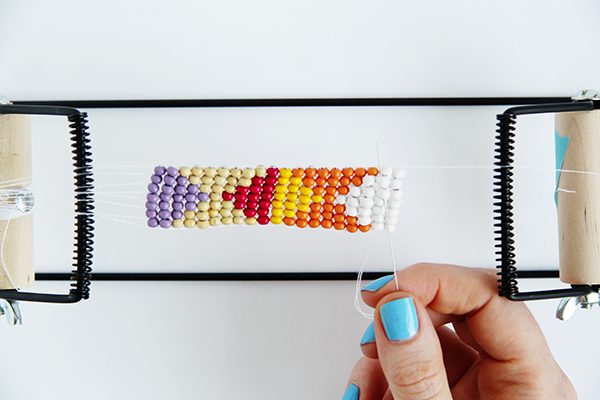
Build Up the Design
To build up your design, continue to repeat these steps, but change the colour and arrangement of the beads.

How to Tie Off Your Weft Thread if It is Too Short
If you cut your weft thread too short (the thread in the needle), you can tie it off and start with a new thread. You can find detailed instructions on how to do this at the above link.
Removing the Work From the Loom
Step 1
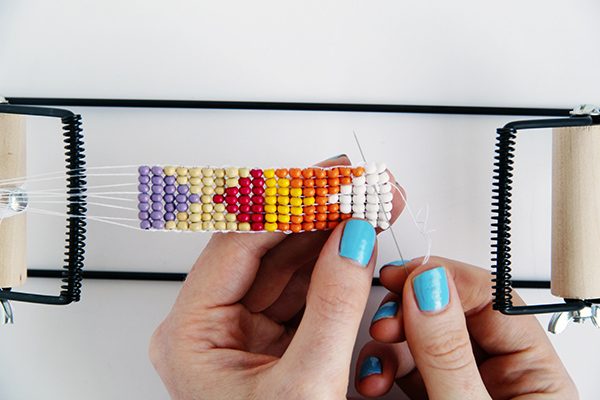
Once you’re happy with your design, you need to remove it from the loom. This part is important to remember! If you don’t thread in your warp threads correctly, all the work you’ve done creating the pattern will fall apart, and you’ll be left with just a beady mess! Firstly weave in your weft (needle) thread back up and down through the beads to secure in place.

After threading a few rows up, cut the excess off in the middle of a row. This hides the thread in the work. Do the same with the “tail” of thread we left at the beginning of the piece.

Step 2
Starting at one end of the loom (it doesn’t matter which), unwind the barrel to release the threads a little. Cut the thread on the far right so that the excess is around 6″ (15cm) long.
Tighten the rest of the warp threads back up again, and thread the loose right thread onto a beading needle.

Begin to weave this thread into the work, going through the first two beads of the first row and back through the first two beads of the second row.


Continue to thread the warp thread through two beads on each row until you run out of thread, then cut off the excess.
Step 3
Cut the next warp thread off the loom exactly the same way as before. Start threading this into the work. This time you’ll go through the second and the third bead from the end of each row.
Repeat these steps with each warp thread, weaving each one in one bead up from the last, until you reach the last two threads.
Step 4
When you reach the last thread on the loom, you will need to change the direction you’re weaving it into the beads. This time, cut the thread off the loom, then weave through the second and third bead from the far side.
Then back through the third and second bead on the next row. Continue as before and cut of the excess once you run out of thread.
Step 5
When you reach the last warp thread, cut off the loom and, holding the work in your hand, thread the warp through the first and second bead of each row. Once you reach the end of the thread, cut the excess off.

 Step 6
Repeat steps 2 to 5 on the other side of the loom. Your strip is now ready to sew onto your craft.
In this beading tutorial we’ve covered threading a loom, creating a beading pattern and form, and removing the beaded work from the loom.